How to quickly fit your client’s A-02 Headphones in clinic?
Use AudAssist Desktop 2.0 to tailor your client's headphones to their unique hearing profile.
Set up AudAssist

Upon first launch of AudAssist on your computer, you will be required to input your clinic information. This will ensure that we can provide you and your clients with seamless software and product support if required.
1. Create new fit

The following steps show how to “Create fit manually”. Or you can watch a video guide here.
2. Confirm connection

- Connect the A-02 Headphones to the computer using the supplied USB-A to C cable. It’s important to ensure that this is a data cable and not just a charging cable.
- The headphones will appear with a green circle in the top right corner when they have successfully connected to your computer.
3. Client details

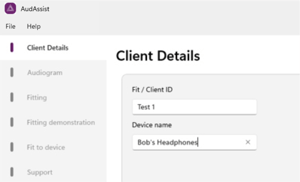
- Enter the client’s name or the preferred identification code for your clinic.
- The client’s headphones can be renamed – this will be the name that appears in Bluetooth device searches.
- When complete, select ‘Audiogram’ in the bottom right to begin manual fitting.
4. Enter fitting

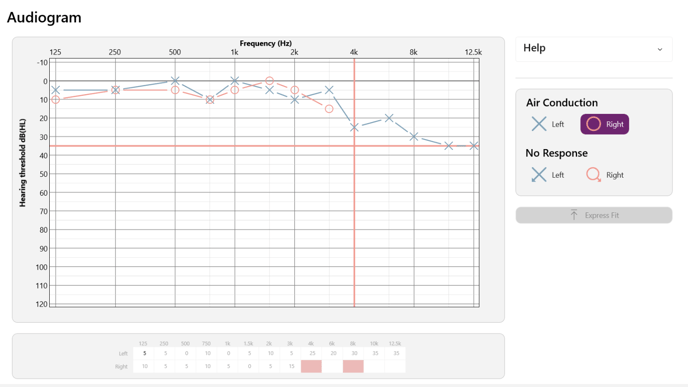
- Select entry type: "Air Conduction" or "No Response" for either Left or Right ear.
- Enter the client’s audiometric thresholds by clicking on the graph with the mouse or enter them directly into the table at the bottom of the screen.
- Ensure that all the required frequencies highlighted in red in the table are entered.
- To delete a frequency, either click on the incorrect point on the graph to remove it, or delete the entry from the table.
5. Upload fitting

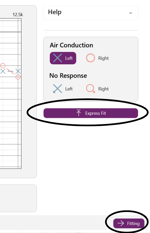
- Either proceed to ‘Express Fit’ to upload the fitting directly to the connected headphones, or click ‘Fitting’ for additional fitting options and a personalisation demonstration.
- If you select ‘Express Fit’, you may need to wait a few moments while it’s being uploaded.
- Once complete, a success notification will appear on the screen. Select ‘Finish’ in the bottom left and unplug the headphones.
